Mobile Assessments User Manual
Mobile Assessments give users the ability to configure custom field tools for technicians to leverage great data from the field. These guided workflows are ideal for prompting data entry and photo collection, outlining new scopes of work, and training new field technicians.

For accessing Mobile Assessments, navigate to the Model Editor and find "Mobile Assessments" underneath the "Mobile" section in the sidebar menu towards the left.
Creating Assessments
To create a Mobile Assessment workflow, click the blue "+" button and name your assessment.

When you click "Continue," you'll start defining the assessment.
First, you'll edit the style of the Mobile Assessment tool by picking an icon and color.
Once you've made your selection, click "CONTINUE."
Next you'll decide what can be assessed in the Assessment Permission section. Choose whether the assessment should apply to existing nodes and new nodes to be added, just existing nodes, just existing sections, existing nodes and existing sections, or just new nodes to be drawn.

Click "CONTINUE" once you've made your choice.
Assessment Steps

Assessment Steps refer to the types of data collected by your field form. Currently, you have the option to set an attribute, set the location, set address data, take a photo, or take multiple photos. To add a step, click the “ADD STEP" with the "+" icon towards the bottom of the Assessment Steps. The different available step types are as follows:
Set Attribute - Prompts the user to set the value for a specified attribute.
Take Photo - Prompts the user to take a photo during the assessment. You can dictate whether the photo should be taken on the mobile device or on an external camera. If you configure the step so that the user takes a photo on their device, you can detail which classification should be used on the photo and it will be uploaded to the node that the assessment is run on.
Take Multiple Photos - Allows the user to take photos for a node. (If the photos are taken on the mobile device, they will also be automatically uploaded to the node.)
Set Location - Prompts the user to confirm the location of a node, move it to a new location, or set its location using an external GPS.
Set Address Data - Button that the user presses to set the address data for the current location being assessed.
Once you select a step, it will be added to the Assessment Steps table.
- First in the row is the number of the order of the step; you can click and hold on the number to then drag that row and change the order of the step
- Next to that will be an icon corresponding to the type of step you've chosen.
- Under "Assessment Step," you can edit the name of the step
- "Step Type" is where you'll specify which step type should be used
- "Details" is any additional selections that need to be made (i.e. the attribute that needs to be set when you choose "Set Attribute" or the classification to be put on the photo when "Take Photo" is selected)
- The checkbox under "Required" is for whether or not the step is required before moving on to the next step in the assessment
- The expand arrow is for expanding the step (we'll cover this further on)
- The delete icon is for deleting that step in the assessment

Each step, when you expand it to see its details, has at least three components. The prompt text is what will appear underneath the "Assessment Step" title. In this example, when the user gets to the third step, they'll see the step title, "Set the Location," along with "Set the pole's location by using the GPS and standing right next to the pole for accuracy." underneath it (see the below image for the mobile user's point of view).

You can also include a prompt image as well, which will show up underneath the prompt text. This can be used to provide a visual reference.
Step Actions allow you to define what happens when a certain trigger is executed. For example, all Step Types have a trigger of "Step Completed." Under "Action" is the action that should take place, such as "Jump to Step," "End Assessment," and "Set an Attribute" as examples. In this example, when the step is completed, it jumps to the next step, Step 4.
Attributes
For the "Set Attribute" step type, you'll have an Additional Attribute Options section with one to two checkboxes. The Allow "Use Last Entered Value" Option means that the user will be allowed to use the value they last entered for this particular attribute. The Display Dropdown attribute as a "Dropdown," when checked, will show the attribute (if it's a dropdown) as a dropdown input instead of displaying its dropdown values as a list of buttons (which is the default).
Photos

If your Step Type is "Take Photo," you'll have a few additional options: Photo Capture Types, Show Classified Photos, and Show Compass. Under "Photo Capture Types" are the options "Device" and "External." If you choose "Device," this will allow the user to either take a photo with their mobile device or upload a photo from their device's photo library. If you choose "External," this step will tell the user to take the picture on an external camera; then they can click the camera icon to "check" that they've taken the photo and move to the next step. Show Classified Photos will show any photos that are already associated to that pole that have been classified (this is more useful for audits rather than initial data collection). The Show Compass option, when selected, will show a compass on that step of the assessment.

For "Take Multiple Photos," you'll choose whether or not to show a compass, and you'll specify your Photo Prompts. In the Photo Prompts table, your Photo Title that you enter will show up inside the camera icon (which will be pressed once the photo is taken on the camera to drop a time bucket on the node). The Classification allows you to pre-classify photos before they reach the back office, saving time. (Photos can only be pre-classified if they are taken on the device and not an external camera.) The prompt text will show up inside the camera icon, underneath the Photo Title. If a Photo Prompt is marked as "required," a red asterisk will appear next to the Prompt Title, and the worker will be prevented from clicking "Next" if that photo was not taken.
Set Address Data
The Set Address Data step type has "Address Components" in its step details.

Select the corresponding address attributes that you want included when setting the address data and leave the components you don't want blank. Under "Options," there is a checkbox that should be checked if you want the state to be abbreviated.
Assessment Actions
After clicking "CONTINUE" next to the "Assessment Steps" title, you can set assessment actions that can be taken depending on the type of mobile assessment you selected under "Assessment Permission."

For "Assess Existing and Draw New Nodes," the action to be taken is "Set An Attribute." The available triggers for when the specified attribute should be set are "Completed Assessment," "Selected Existing Node," or "Created New Node." So when the user performs one of those triggers, (they complete the assessment, they selected an existing node to assess, or created a new node to assess,) the software will set an attribute on the node. You can select which attribute should be set from the dropdown underneath "Details" and then assign it a value or leave the value blank.
For "Assess Existing Nodes," "Assess Existing Sections," and "Asses Existing Nodes and Sections," the action to be taken is "Set An Attribute," and the triggers you can select for when the attribute should be set are "Completed Assessment" or "Selected Existing Node."
For "Draw New Nodes," the software is still going to set an attribute, and the available triggers are "Completed Assessment" or "Created New Node."
This can be useful, especially when used in conjunction with Map Styles. You can also style the nodes according to which ones have been assessed by creating an attribute such as "Assessed," adding that to the Assessment Actions with the trigger being "Completed Assessment" and styling the node accordingly using the Map Styles Editor (and potentially stacked styles).
Toolsets
Finally, choose which Toolset(s) you want the mobile assessment to show up in.
Once you're done with this, you can select the "Finish Creating Mobile Assessment" button. If you're editing your mobile assessment, don't forget to hit "Save" in the top right-hand corner. If you want to test your mobile assessment, you can click "Preview," which will open a sandbox job for you to test your mobile assessment.
Assessments on Mobile
Once the Mobile Assessment tool is created, it is ready to be used in mobile.

First, click on the dropper to locate your assessment tool to change it. Now you can hover over a node to assess (or hover a location to insert a node and assess if the assessment places and assesses a new pole). Now the Mobile Assessment window will open to fill in the data of the assessment.
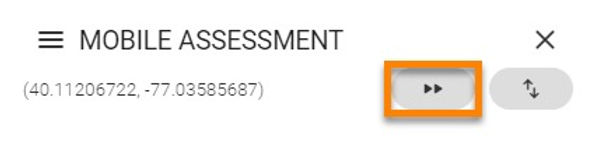
The fast forward button in the top right corner allows fielders to quickly go through the questions without having to click "next" after they make their selection.
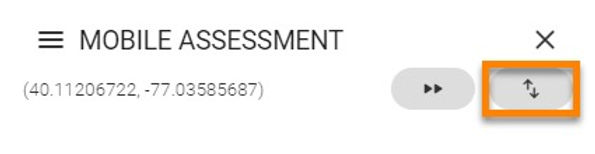
They can also see all steps at once by clicking the up and down arrows at the top right corner.

If the field worker chooses to have the fast forward off and uses the single data entry window, he or she can use the “Back” or “Next” arrows at the bottom of the screen to navigate the assessment. When presented with attribute data, they can easily enter the data then hit next.
When a Photo step occurs, the worker will take a picture either with the device or with a camera, depending on the step's instructions. The step will either say, "TAKE PHOTOS WITH THIS DEVICE" or "PHOTOS TAKEN ON OTHER CAMERA." Clicking the icon to take a picture on the device or to mark that the worker has taken a picture on the camera will drop a time bucket onto the node.
If the Photo step requires using the device for the photo, please note that if you choose the option "Take Photo," it will not save the photo to the device's camera roll. It's recommended that you take a photo on the device and then select the option "Photo Library" to choose the photo from the device's camera roll if you're in an area with spotty connectivity so that the photo is saved before uploading.
If the step is for multiple photos, the field worker will see the Photo Title for each photo needed. Shots with the red asterisks will be required, and the worker won’t be able to hit "Next" until that shot is marked as complete.
When the required photos have been taken, the “Next” button will be available to move on to the next step.
Once the Assessment is complete, the window will display “Assessment Completed,” and the option to “Close Mobile Assessment” will appear.