Map Overview
When using Katapult Pro, ensure you're using the Chrome browser. When you first sign in to Katapult Pro, you'll be taken to Katapult Pro Maps. In this manual, we'll cover the layout of the Maps page and what each feature does. When you land on the Maps page, you can see that a “Welcome to Katapult Pro Maps” window is displayed.
Create A Job

In this Welcome window, you can select existing Jobs by using the dropdown, or create a new job by selecting “Create New Job”. (If you select an existing job, it'll open that job on the Map.)

If you choose to "Create New Job," another window will appear where you can enter the name and select a job model.
You can also add the Job to a specific Folder to stay organized. If you click on the “Add to Project Folder” option, the "SET JOB LOCATION..." window will open.

At the bottom left of the window, there will be an option to create a "New Folder," which will allow you to enter the folder name then click “Create Folder.”

Once the folder is created, you can click on it and hit “Select” to move the newly created job to that folder.

You can also right-click on the folder icon to have the option to rename, delete, update Map Styles for the jobs in the whole folder, share the folder, check the folder into the Master Location Directory, or export the folder's directory of jobs. (More on Map Styles in our Map Styles Manual.)
Once the name, model, and folder have been entered or selected, click “Create Job.”

This will pop open a window to zoom to a location.

You can use this text field to enter the address where you will be pre-designing or scoping your job. If you enter an address, clicking the magnifying glass will take you to that location on the map.

Now that you've created a job, let’s start at the top left of the Maps page and work our way around the software clockwise.
Job Selector
In the top left is the Job Selector. You can switch jobs by clicking in the text field and entering the name of a different job you'd like to open.

You can also "SHOW ARCHIVED" jobs and "CREATE NEW JOB" at the bottom of the window. The globe icon next to a job name means that the job has been shared.
Job Settings
Moving to the right is the Job Settings.

This is represented by the gear icon. Clicking this will open a right-hand panel on the side, detailing Job-level attributes and settings. At the top of the Job Settings panel, you can click the three-dot menu to rename the job, edit the map styles, and more. (We'll explore these options in depth later on.)

In this window, you can add job-level attributes to the job. For example, you can enter a note on the job. Or you could create a "Status" job attribute (using the Model Editor) to add to the job. You can also change the folder location and job model here.
Next to the "Current Job's Models" is an "X," and next to that is a list icon with a check mark. This will allow you to validate your model to see if it is compatible with the job.

The Model Validation window will step you through any found conflicts.
Choose from files on your computer and add it to your job via the “Add File” upload at the bottom of the Job Settings panel. (You can also upload files to a model so it is accessible to other jobs using that same model. See the Model Editor Manual for more details.)
Click the blue "Add File" button and search for the file you want to upload. After you select the file, you will see the file name listed.
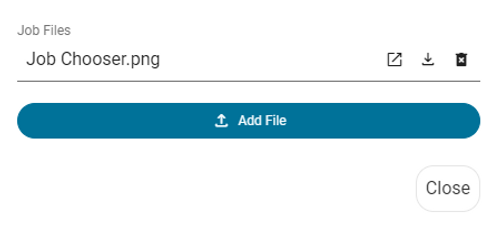
The file(s) will be contained in the uploaded files section in the Job Settings panel. You will be able to view files in a separate window, download files, or delete files at any time using the icons to the right of the file name.
At the top of the Job Settings panel is a three-dot menu that contains eight editable settings in the job.
The first option in this list, as you'll see in the above GIF, is the "Remove Attribute" option. This option allows you to remove any of the job attributes (also referred to as metadata) that you'll find below the "JOB FILES" section.

"Remove Attribute" will toggle on and off trash can icons to the left of all attributes in the Job Settings panel. Click the trash can icons to delete individual item(s).
Moving down the three-dot menu, the next option after "Remove Attribute" is "Rename Job."

This button will open up a window (pictured above) where you can enter the new name. However, if you are not the owner of the job, you will not be able to rename it.

If this is the case, that button will be faded with a tooltip communicating this to you (see above screen capture).
The next option, "Create Snapshot," allows you to create a snapshot so that you can save your progress in the job and restore it later if needed. More details about snapshots are located at the end of this section.
Clicking the "Duplicate Job" button will open a new window (pictured below) where you can create a new name for the duplicate job.

This button is useful in creating master copies to be used to section out into smaller jobs that are easier to collect.
Including the date in the job name or adding a job attribute that references the original job this duplicate was copied from provides helpful context for understanding when this job was made and where the job's data came from. Later down the road you'll understand how this job fits into the bigger picture.
Clicking the "Map Styles" button will open the Map Styles Editor, where you can set icons and colors for your model’s connections, nodes, and sections based on conditions.

More details on how to use the Map Styles Editor are found in our Map Styles Manual.
The "Master Location Directory Settings," when clicked, will open a window (pictured below).

In this window are two options: Job Settings and Directory Settings. Under Job Settings is where you can check the job's poles into the Master Location Directory by clicking the arrows next to the trash can. The trash can is used to remove any poles in this job that were checked in from the Master Location Directory.

In the Directory Settings, you can create up to four Master Location Directories. Under each directory, you can determine up to ten attributes that you want to show up on the Master Location Directory's layer, the color of the location markers, and the filtering mechanism for checking in poles by entering custom logic in the Logic Editor.
The "Archive Job" button will remove the job from showing up in the Job Chooser. You can still find it by selecting "SHOW ARCHIVED" from the Job Selector.
The last icon is the "Delete Job" trash can and will be used to delete a job.

When this button is selected, you will need to type in “delete” to confirm that you intentionally want to delete the job. After you type in "delete," click the “Delete” button at the bottom to permanently delete the job. Similar to renaming a job, you can only delete the job if you are the job owner.

The software will fade out this option and let you know that you cannot perform this function because you do not own the job.
Job Snapshot
Job Snapshots is an ability that allows you to save a “snapshot” of the job's state at that point in time that you can use as a backup to restore the job at a later date if needed. Snapshots are stored on the job itself.
To create a snapshot, open the Job Settings panel and click on the three vertical dots next to the job name.

Click “Create Snapshot.”
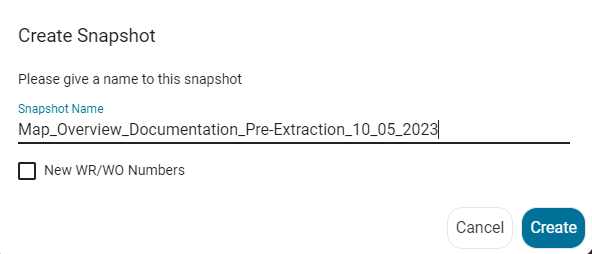
You’ll then be prompted to give the Snapshot a name, then click “Create.”
Adding the date provides helpful context later down the road to understand where in the job's timeline this snapshot was created.
The Snapshot will be available under the Job Settings panel from where you first started creating it.

Selecting the reverse clock icon will reset the job back to the state when the snapshot was created. The square pop out button will open the snapshot in a new tab for you to view it in. In this new tab, you can edit the snapshot without affecting the original job itself.
Job Chooser
Next to the Job Settings gear is the "Job Chooser" folder icon.

This allows you to open the file directory where all your jobs are stored so that you can move jobs around, create folders, etc. while remaining in the same job.
Feedback
Next to the Job Chooser is the button for Feedback.

Feedback is a feature that allows you to leave comments for other team members on nodes and start conversations reviewing any work and information in the job. Any Feedback in the job will be displayed in the "Feedback Details" window when you click on this icon. Learn more about leveraging Feedback here.
Download Manager
Moving to the right is the Download Manager for the job.

Clicking this icon will allow you to download different types of photo, 3D model, map, and data deliverables from the job. We will explore this in more detail in the Download Manager Manual.
Poles Completed
As poles are added to the map, a "Poles Completed" counter will be added to the right of the Download Manager. This counter is based off the "done" attribute, so as a pole's "done" checkbox is marked, the count will go up.

You can also click the white “i” button in the counter to open up more details about the types of nodes in the job and their ownership.
The counter in the mobile interface works differently than the counter in the desktop interface. In the mobile interface, "Poles Completed" is based on which poles have been "marked as done" and have time buckets. On desktop, it's whichever poles have been clicked "Done" on the desktop interface.
Search Bar
Once poles are added to the map, use the "Search Poles/Location" dropdown at the top to easily navigate to a pole within the job.

The dropdown will display a SCID ("sequentially coded identifier" used to identify poles) if the poles are ordered (using the "Order" tool in the Office Tools toolset), as well as any pole tag information that is contained in the Node Info panel. (More about SCIDs and ordering poles in our Office Tools & Job Prep Manual.)

Otherwise, the dropdown will show the node ID.
Pole Filter List
For an advanced search, use the logical AND / OR in the Pole Filter List to combine different attribute statements and groups of attributes to find poles on the map by using the “Advanced Filters” button to the right of the dropdown (the green funnel). For example, do you only want to find 35’ (or taller) poles that are marked "Done" and that have a birthmark?

The above screenshot shows how to use the pole filter to filter this. Make sure to toggle the "FILTER MAP" if you want the Map to display filtered poles. To close the window, click the “Advanced Filters” button again.
Map Views
The five buttons next to the pole filter list at the top ( ) deal with various Map Views. The first view is Make Ready View, and the second is Pole Loading View. Both of these will only be present if your current job model is set up with the correct service offerings. The lock icon is Read Only Mode, the three vertical bars icon is Cable Trace View, and last is Toggle Print Mode.
Make Ready View should be turned on when calling make ready.

Click the button to turn on Make Ready View, and it should turn green. You can turn the view on or off by clicking the button. More information about Make Ready can be found in our Make Ready Manual.
When Pole Loading View is enabled, the button will also appear green and your deliverable pole photo will now display real-time loading analysis for both the existing state of the pole and the make ready calls. (To see the loading analysis for make ready calls, ensure that the Make Ready View is also enabled, demonstrated below.)

More information on Katapult Pro Integrated Pole Loading can be found in our Integrated Pole Loading Manual.
Read Only Mode is automatically turned on whenever a shared job is opened. The lock icon will turn red to show the job is locked.

In this view, data can still be seen and the Download Manager can still be accessed. In read-only mode, however, edits are disabled and the Toggle Print Mode disappears. Only licensed users with write access can click this button to turn off read-only mode and enable edits.
Cable Trace View is used when annotating or marking the height of attachments on associated photos.

When this view is on, a highlight will be noticeable around connections.

You can then click on the connection to enter the Photos page and begin tracing. More on annotations and cable tracing in our Annotations, Tracing, & Hardware Details Manual.
The last button at the top is the Map Print Mode.

This is used to create basic map PDFs that can be used as a deliverable. We explore this in more depth in our Saved Views & Map Prints Manual.
Job Sharing
Clicking the share button (adjacent to the multiple view buttons) will open the Share window.

This Share window shows three options for how to share the job:

You can share the job with Existing Contacts (Katapult Pro companies) or Email Addresses or create a read-only shareable link.
When using either the Existing Contacts or Email Addresses options, you can share with read-only access or write access. Read-only access will open up a view of the data. Write access opens up the access for that recipient to change, update, or enter information. Their user will need to be licensed with write permissions to actually have the ability to change, update, or enter information.
If you are listed as an admin, you will have options to transfer ownership or duplicate the job before transferring (as shown below), in addition to sharing with read access and write access.

Once the details are entered correctly, click “SHARE.” This will send the specified contact an email notifying them that a job has been shared.
It will also open up a window for the option to add the poles to a Master Location Directory:

Clicking "Check In" will add the poles to the layer you selected, which can be turned on via the Job Layers list.

You'll get a "Check In Summary" to let you know which nodes were checked in. This is a valuable tool to show which poles have been collected in the past, and you can always remove jobs from this layer using the Job Settings.
The third option is to create a read-only shareable link for the job.

If you click this button, you can set an expiration date for that link. Copy the link and share with the party of your choosing.
Once you've shared your job, anyone with access to the job can click the Share button to view "Current Sharing," where all companies and read-only users with access to the job are displayed:

Only the job owner can edit the access shared to the job. They will see a pencil icon next to all other companies. Click the pencil to open your options; you can toggle the "Write" slider to switch between read-only access and write access or revoke access altogether by clicking the "Delete" trash can.
Help
The question mark icon is the "Show Help" button.

In the modal it opens, to the right, you'll find the "Need Help?" section that includes...
- Training Resources: helpful links to learn about the software
- Approved Cameras: information about the specific camera and lens combinations to use with our software and their necessary settings
- Order Equipment: a link to our online store for purchasing equipment used in conjunction with Katapult Pro
- Bug Report: form to fill out if you are experiencing any issues that gets sent to our Support team when submitted.
To the left, you'll probably first notice the "Using Current Release" in green, which is a dropdown.

Click on the dropdown to reveal the other versions of the Katapult Pro you can leverage:
- Current Release: the most stable version of Katapult Pro that is recommended for daily usage
- Beta Release: provides a preview of new features that have been tested and stabilized in addition to everything in the current release
- Alpha Release: suited for users who want to be on the cutting edge of released Katapult Pro advancements and features
- Legacy Release: version previous to the current release; not recommended for daily usage, this release exists as a back-up for edge case scenarios
Underneath this you'll find not only legal information, but the Katapult Pro Version and the Release Notes.

If there are new Release Notes you have not read, the "Get Help" button will have a blue "NEW" badge, and the button to open the Release Notes will say "SEE WHAT'S NEW."

Click the Release Notes button to open a dialog window with the most recent, relevant release notes detailing any updates, upgrades, and fixes made in the last month.

Click on provided links to see the full release notes, and scroll down to see release notes from previous months.
Additionally, the button next to "Release Notes," labeled "New in 2025," displays news about what to expect this year for Katapult Pro in a dialog window:

App Tray
The “Other Apps” button, or the App Tray, will open a menu to navigate to other pages within the platform.
.jpg?Policy=eyJTdGF0ZW1lbnQiOlt7IlJlc291cmNlIjoiaHR0cHM6Ly9kemY4dnF2MjRlcWhnLmNsb3VkZnJvbnQubmV0L3VzZXJmaWxlcy80MTE2Ni81MzA0MC9ja2ZpbmRlci9pbWFnZXMvcXUvMjAyNS9hcHAtdHJheSgxKS5qcGciLCJDb25kaXRpb24iOnsiRGF0ZUxlc3NUaGFuIjp7IkFXUzpFcG9jaFRpbWUiOjE3ODIyNzIzMDJ9fX1dfQ__&Signature=YTCvkINrNzbRc~Qb~XpViOLq7qG~MtaZSaUmnLk~a5m1jzjaARkrpP1llCYKbDt47oPqkKb9O1xa26rtUJmo63HEzIX7RvC3bzxI6z8se-klBk50MGiiDCJHprKLnnrfriiy5nJ6TSLR2qaiYqlCz37KkpowH6HJluPrOgWzMYSqmYEPIOHGmyDUVMHjb3OeImf54RhHQe-FL769fvA~AJ9aagsVxE~K-lVNzJy8bvIL37ouHvAnDiKIzIz01CofzMgpP~ONVC-6XDCMqRQ9CpPXxTCnO-hed9EK88qorbraM8CTTUZCRFBB1jiYqip9zn4qSrW~skgRTg2PkPOdMQ__&Key-Pair-Id=K2TK3EG287XSFC)
Clicking on any of these will open a new page. The following pages will display here:
- Map: accesses jobs for you to create, edit, and update
- Photos: displays the photos in a job where they can be marked up with data
- Upload: allows you to upload photos to the software
- Dashboard: legacy page that takes you to the Project Management Dashboard
- Viewer: legacy page used to view photos
- Admin: used by admin users to create users, configure permissions, etc.
- Model Editor: used to add and edit attributes, configure how your data is structured, etc.
>> more on the Model Editor in our Model Editor Manual
- Home: houses widgets used for things such as timesheets, feedback, generating API keys, access to API and training resources, etc.
- Virtual Rideout: accessible with the Engineering Design offering, this tool filters data for presenting Make Ready engineering in a simplified format
>> more in the Virtual Rideout Manual
- Project Management: contains tools for reporting across projects, organizing and visualizing projects, etc.
You can create your own Custom pages for the App Tray (from the Project Management page) that link to other internal Katapult Pro pages or link to external pages that can be used for reference or the next step in your workflow. Visit our Introduction To Extensibility Guide to learn how.
Account Options
At the far right is your avatar, where you can sign out, edit your user settings, view recent feedback, and more.

If you set up your Gravatar, the profile picture you use for that will show up in Katapult Pro instead of the default letter that matches your email (or first name if you set your contact information).
Click on your avatar to show your Account, Sign Out, and Hide Feedback options.
The first button, Account, will allow you to update your contact info, change your password, and adjust your user settings. At the far right is the "Hide Feedback" button, which will hide the abridged list of feedback and then toggle to "Show Feedback" in case you want to bring it back. Finally, the middle button allows you to sign out of Katapult Pro.
For more detail about what the different user options do, please reference the graphic below:

- Use Metric Units: Displays heights in photos in Katapult Pro in meters instead of feet-inches.
- Use Decimal Feet: Displays heights in photos in Katapult Pro as decimals instead of feet-inches.
- Right Click for Photo Tools Menu: The photo tools menu requires right clicking in the photo instead of left clicking.
- Disable Attribute Auto Focus: Users will no longer be prompted to enter missing node attribute data.
- Open Photos in New Tabs: Will open a new tab for each photo selected from the map page instead of reusing a single tab.
- Auto-Dock Search Bar: The search bar will be automatically pinned to the left side of the map page.
- Portal Email Notifications:
- Use Small Cursor (Perfect Center) for Calibration:
- Photo View Zoom Sensitivity:
- Enable native notifications for Feedback:
- System Notifications: Receive email notifications for updates regarding billing, user authentication, new jobs shared with your company, and when job photos have been uploaded.
- Workflow Management Notifications: Receive email notifications for updates to any job status, critical job status, when field data is available, and any admin notice.
- Marketing Notifications: Choose to receive emails related to different Katapult Pro features.
Toolsets
The "TOOLS" dropdown at the right of the Map page allows you to switch between your model's toolsets.

Hovering the mouse over a tool within the toolset will display the tool's name. If there is a shortcut for the tool, the letter or number shortcut to use the tool will be contained in parentheses. Click on a tool or enter the shortcut on the keyboard to use it.
Node Info Panel
Double click on a node or single click and select the pencil icon from the map to open the Node Info panel on the right side of the map.
The Node Info panel displays all attributes associated with the selected node. Attribute groups can be selected to expand or collapse the group, allowing you to quickly navigate to the information you need.
Adding Attributes
You can search through the "add attribute" input at the top of the panel and select the plus sign to add the attribute to the node.

Removing Attributes and Photos
Select the three-dot menu in the top right of the Node Info panel and select "Remove Attribute/Photo" to enable trashcans next to attributes and photos. Click the trash can icons to delete individual item(s).
Once you're finished removing attributes or photos, go back to the three-dot menu to click "Remove Attribute/Photo" again so that you can toggle off the trash cans. This way you won't accidentally delete attributes or photos that you intend to keep.
Viewing Photos
Single click on a photo in the Node Info panel to enlarge it on your main screen. Double click on the photo to open up the photo in the Photos tab, where you can add annotations, trace cables, and more.
Map Hover Shortcuts
In the Maps page, there are shortcuts available to set attributes on nodes when you hover your mouse over them and press a key on your keyboard.

For example, you can have your models configured so that hovering your mouse over a node and clicking "d" on the keyboard will mark the node as "Done." To configure a Map Hover Shortcut, reach out to support@katapultengineering.com.
Streetview
At the bottom left corner of the Map is the Streetview "pegman." This works similarly as the pegman on Google Maps.

You can use this by dragging the pegman to areas that have Streetview, which is often used to aid in pre-design. The areas on the map that have Streetview will be represented by a blue line. Once placed, the pegman will be represented by a yellow circle with a triangle. The triangle will point in the direction you are facing in Streetview, and as you move in Streetview, the pegman will move with you on the Map.
You can click and drag the pegman to a new position on the Map anytime you would like to move the view to that position. Holding down the "Ctrl" key while dragging the pegman will change the rotate on angle of the Streetview pegman. To remove the pegman, close the Streetview page.
Map Tilt
In some areas of the map where lidar-compatible imagery is found, you'll see the Map Tilt button appear (depicted below).

You can click on the button to tilt the map and use the arrows to rotate the tilt (reference the GIF below to see this in action).

Measure
The ruler icon above the Streetview pegman is the measure tool.

Clicking this will start the measuring routine on the map.
You can drop points on to the map by left-clicking, and remove the most recent point by right-clicking. When you are done, you can click the ruler icon again to stop measuring.
Find Me
Clicking the target icon (depicted below) will center the map to your location based on the GPS of your device.

Map Layers
The last button above the navigation target is the Map Layers button. This deals with anything displayed on the map.

You can adjust team avatars displaying on the map, labels, the legend, location directories, pull up reference jobs, use crumb trails, imported layers, map bases, and saved views.
Team Avatars
Team Avatars allows you to toggle on or off the team avatars displayed on the map.

If you have Team Avatars on, you'll be able to see where teammates are working, on which job, and on which interface.
Labels
Labels can be used to display any attribute data onto the map. When you expand the dropdown, you can see which attributes have been selected and add more labels by using the “Add a label” dropdown.

For example, if you wanted to see pole tags on the map, you could search for "pole tag" in the dropdown and that attribute will be displayed next to the poles. To turn off any labels, uncheck the box for that attribute.
Legend
Expanding the Legend dropdown in Map Layers will display the current list of icons and symbols and what they represent on the map.

You can also uncheck the box to turn off the style from displaying on the map.
Location Directories
Location Directories are used to display poles in a specific state from past jobs on the Map while working on a current job.
If you click on the location marker, it'll list which job(s) the pole can be found in and any attributes specified in the Master Location Directory's settings. You can turn on these layers from the Location Directories drop down. Create Master Location Directories from the Job Settings.
Jobs
You can expand the Jobs dropdown to turn on multiple reference jobs at once on the Map. Look for the folder or job you want to view, then check the box.

When you toggle on multiple jobs, the reference jobs will be displayed in read-only view. You will be able to see what job the poles belong to, and you can see the data and photos from the job. In order to make edits, you will need to actually navigate to the job via the job chooser at the top left of the Map.
Imported Layers
You can manage imported layers of the map by clicking on the gear icon under "Imported Layers."

This will open the "Manage Map Layers" window.

You can use this to upload KMZ or .shp files, which adds a new overlay to the map. Click "Choose File" under "File Imports" to import these map files. Under "Manage Overlays," click "Choose File" to select an image to upload. If you have reference layers or external API, you can use the dropdowns to choose which layers to add to the map.

When a file has been uploaded, you will see the option to turn the layer on under the Imported Layers dropdown to the left. If you return to the Manage Layers window, you can download the file, edit the file, or delete the file by clicking the trashcan icon.
You can also add reference layers to a job's model, where you can edit the reference layer's Map Styles and more. More information about this can be found in our Model Editor Manual.
Map Base
You can change the imagery of the map by changing the Map Base.

Options are Hybrid, Roadmap, Terrain, Satellite, and Roadmap Printed. Toggling between these options is helpful during the Pre-Design segment of the normal workflow to help figure out the location of poles. Read more about Pre-Design in our Pre-Design Manual.
Saved Views
Lastly, Saved Views are used to create custom views of the map, which can be used with the Map Print Mode to create custom map PDFs.

Click "Manage Saved Views" and visit the Saved Views and Map Prints Manual to get started.